Template
Use Templates to simplify your integration
In the Yousign app, you can quickly create and set up Templates for Signature Requests. These Templates allow you to pre-configure all aspects of a Signature Request, such as the Document, Signers, Fields, and settings.
Templates are especially powerful if you frequently send similar kinds of Signature Requests, helping you save time and streamline the integration process.
Leveraging the API, you can create Signature Requests from a Template in no time.
To create a Template, go on the Template page of your Yousign app. Learn more about Template creation here.
The following are the elements that can be pre-configured on the Template:
- One or multiple signable Documents (mandatory)
- One or multiple attachments (optional)
- One or multiple Signers (optional), they can be of two types:
- Recurring Signer: use this option to assign a person who will be consistent across all requests created from the Template. You must add the person’s details directly in the Template.
- Placeholder Signer: This option is ideal if a different person will sign each time a request is created (see Placeholder Signer).
- Approvers, Followers (optional)
- One of multiple Fields (optional)
Create a Signature Request from a Template
Go on the Template page of your Yousign app, select the Template of your choice, then copy its template ID.
Template status
Make sure that the Template status is set to
activeand notdraft.
Then, initiate a new Signature Request with the usual POST /signature_requests endpoint (see API Reference), and specify a value for the template_id property.
{
  "name": "A new SR from a Template",
  "delivery_mode": "email",
  "template_id": "9a93d3b5-fb3b-4abf-9e70-26315b33506c"
}
Workspaces scope
In the app, we can choose to restrict the use of a Template to a specific Workspace.
When creating a new Signature Request from a Template, you should make sure to either:
- not specify a
workspace_idfor the new Signature Request, it will automatically be created in the Template’s Workspace.- specify a
workspace_idfor the new Signature Request that correspond to the Template’s Workspace. If both Workspaces are different, it will generate an error.
The Signature Request that has been initiated will inherit all the pre-configured elements from the Template.
From that point, you can keep editing your Signature Request as usual (add Signers, Approvers, modify settings, etc.).
Once you are done, you must activate the Signature Request (see API reference).
- Case 1: only the document has been pre-configured on the Template. Then you must add at least one Signer to the Signature Request after initiation before being able to activate it.
- Case 2: a document and at least one Signer has been pre-configured on the Template. Then you can activate the Signature Request right after the initiation.
Environment scope
- Templates created in Sandbox can only be used to create a Signature Requests in Sandbox.
- Templates created in Production can only be used to create a Signature Requests in Production.
Create a Signature Request from a Template with Placeholder Signers
Add a Placeholder Signer
When adding a Signer to a Template in your Yousign app, you must choose between two options:
- Recurring Signer: use this option to assign a person who will be consistent across all requests created from the Template. You must add the person’s details directly in the Template.
- Placeholder Signer: this option is ideal if a different person will sign each time a request is created.
The Placeholder Signer is given a label (e.g. seller, buyer...).
Create the Signature Request from API
- Go to the Template page of your Yousign app, select the Template of your choice, then go to
Edit template.

- Retrieve the
labelof each Placeholder Signer on the right panel. In this example, thelabelis seller.
- When you initiate a new Signature Request from the API, you must replace each Placeholder Signer with a real Signer.
Use the usualPOST /signature_requestsendpoint (see API Reference), and specify values for thetemplate_placeholdersobject. Each placeholder Signer is identified thanks to itslabelproperty.
⚠️ Thelabelis case sensitive, so make sure to use the exact copy (i.e. "Seller" is different from "seller").
As usual, you can either create a Signer from scratch or use an existing Contact or User (see Signer page).
{
  "name": "A new SR from a Template",
  "delivery_mode": "email",
  "template_id": "9a93d3b5-fb3b-4abf-9e70-26315b33506c",
  "template_placeholders": {
    "signers": [
      {
        "label": "seller",
        "info": {
          "first_name": "John",
          "last_name": "Doe",
          "email": "[email protected]",
          "locale": "en"
        }
      }
    ]
  }
}
{
  "name": "A new SR from a Template",
  "delivery_mode": "email",
  "template_id": "9a93d3b5-fb3b-4abf-9e70-26315b33506c",
  "template_placeholders": {
    "signers": [
      {
        "label": "seller",
        "info": {
          "first_name": "John",
          "last_name": "Doe",
          "email": "[email protected]",
          "locale": "en"
        }
      },
      {
        "label": "buyer",
        "info": {
          "first_name": "Maria",
          "last_name": "Smith",
          "email": "[email protected]",
          "locale": "en"
        }
      }
    ]
  }
}
{
  "name": "A new SR from a Template",
  "delivery_mode": "email",
  "template_id": "9a93d3b5-fb3b-4abf-9e70-26315b33506c",
  "template_placeholders": {
    "signers": [
      {
        "label": "seller",
        "info": {
          "contact_id": "9b6ed2f3-244f-487a-baa1-bbe4f51c8748"
        }
      }
    ]
  }
}
{
  "name": "A new SR from a Template",
  "delivery_mode": "email",
  "template_id": "9a93d3b5-fb3b-4abf-9e70-26315b33506c",
  "template_placeholders": {
    "signers": [
      {
        "label": "seller",
        "info": {
          "user_id": "9b6ed2f3-244f-487a-baa1-bbe4f51c8748"
        }
      }
    ]
  }
}
Create a Signature Request from a Template with empty Read-Only Text Fields
Add an empty Read-Only Text Field on a template
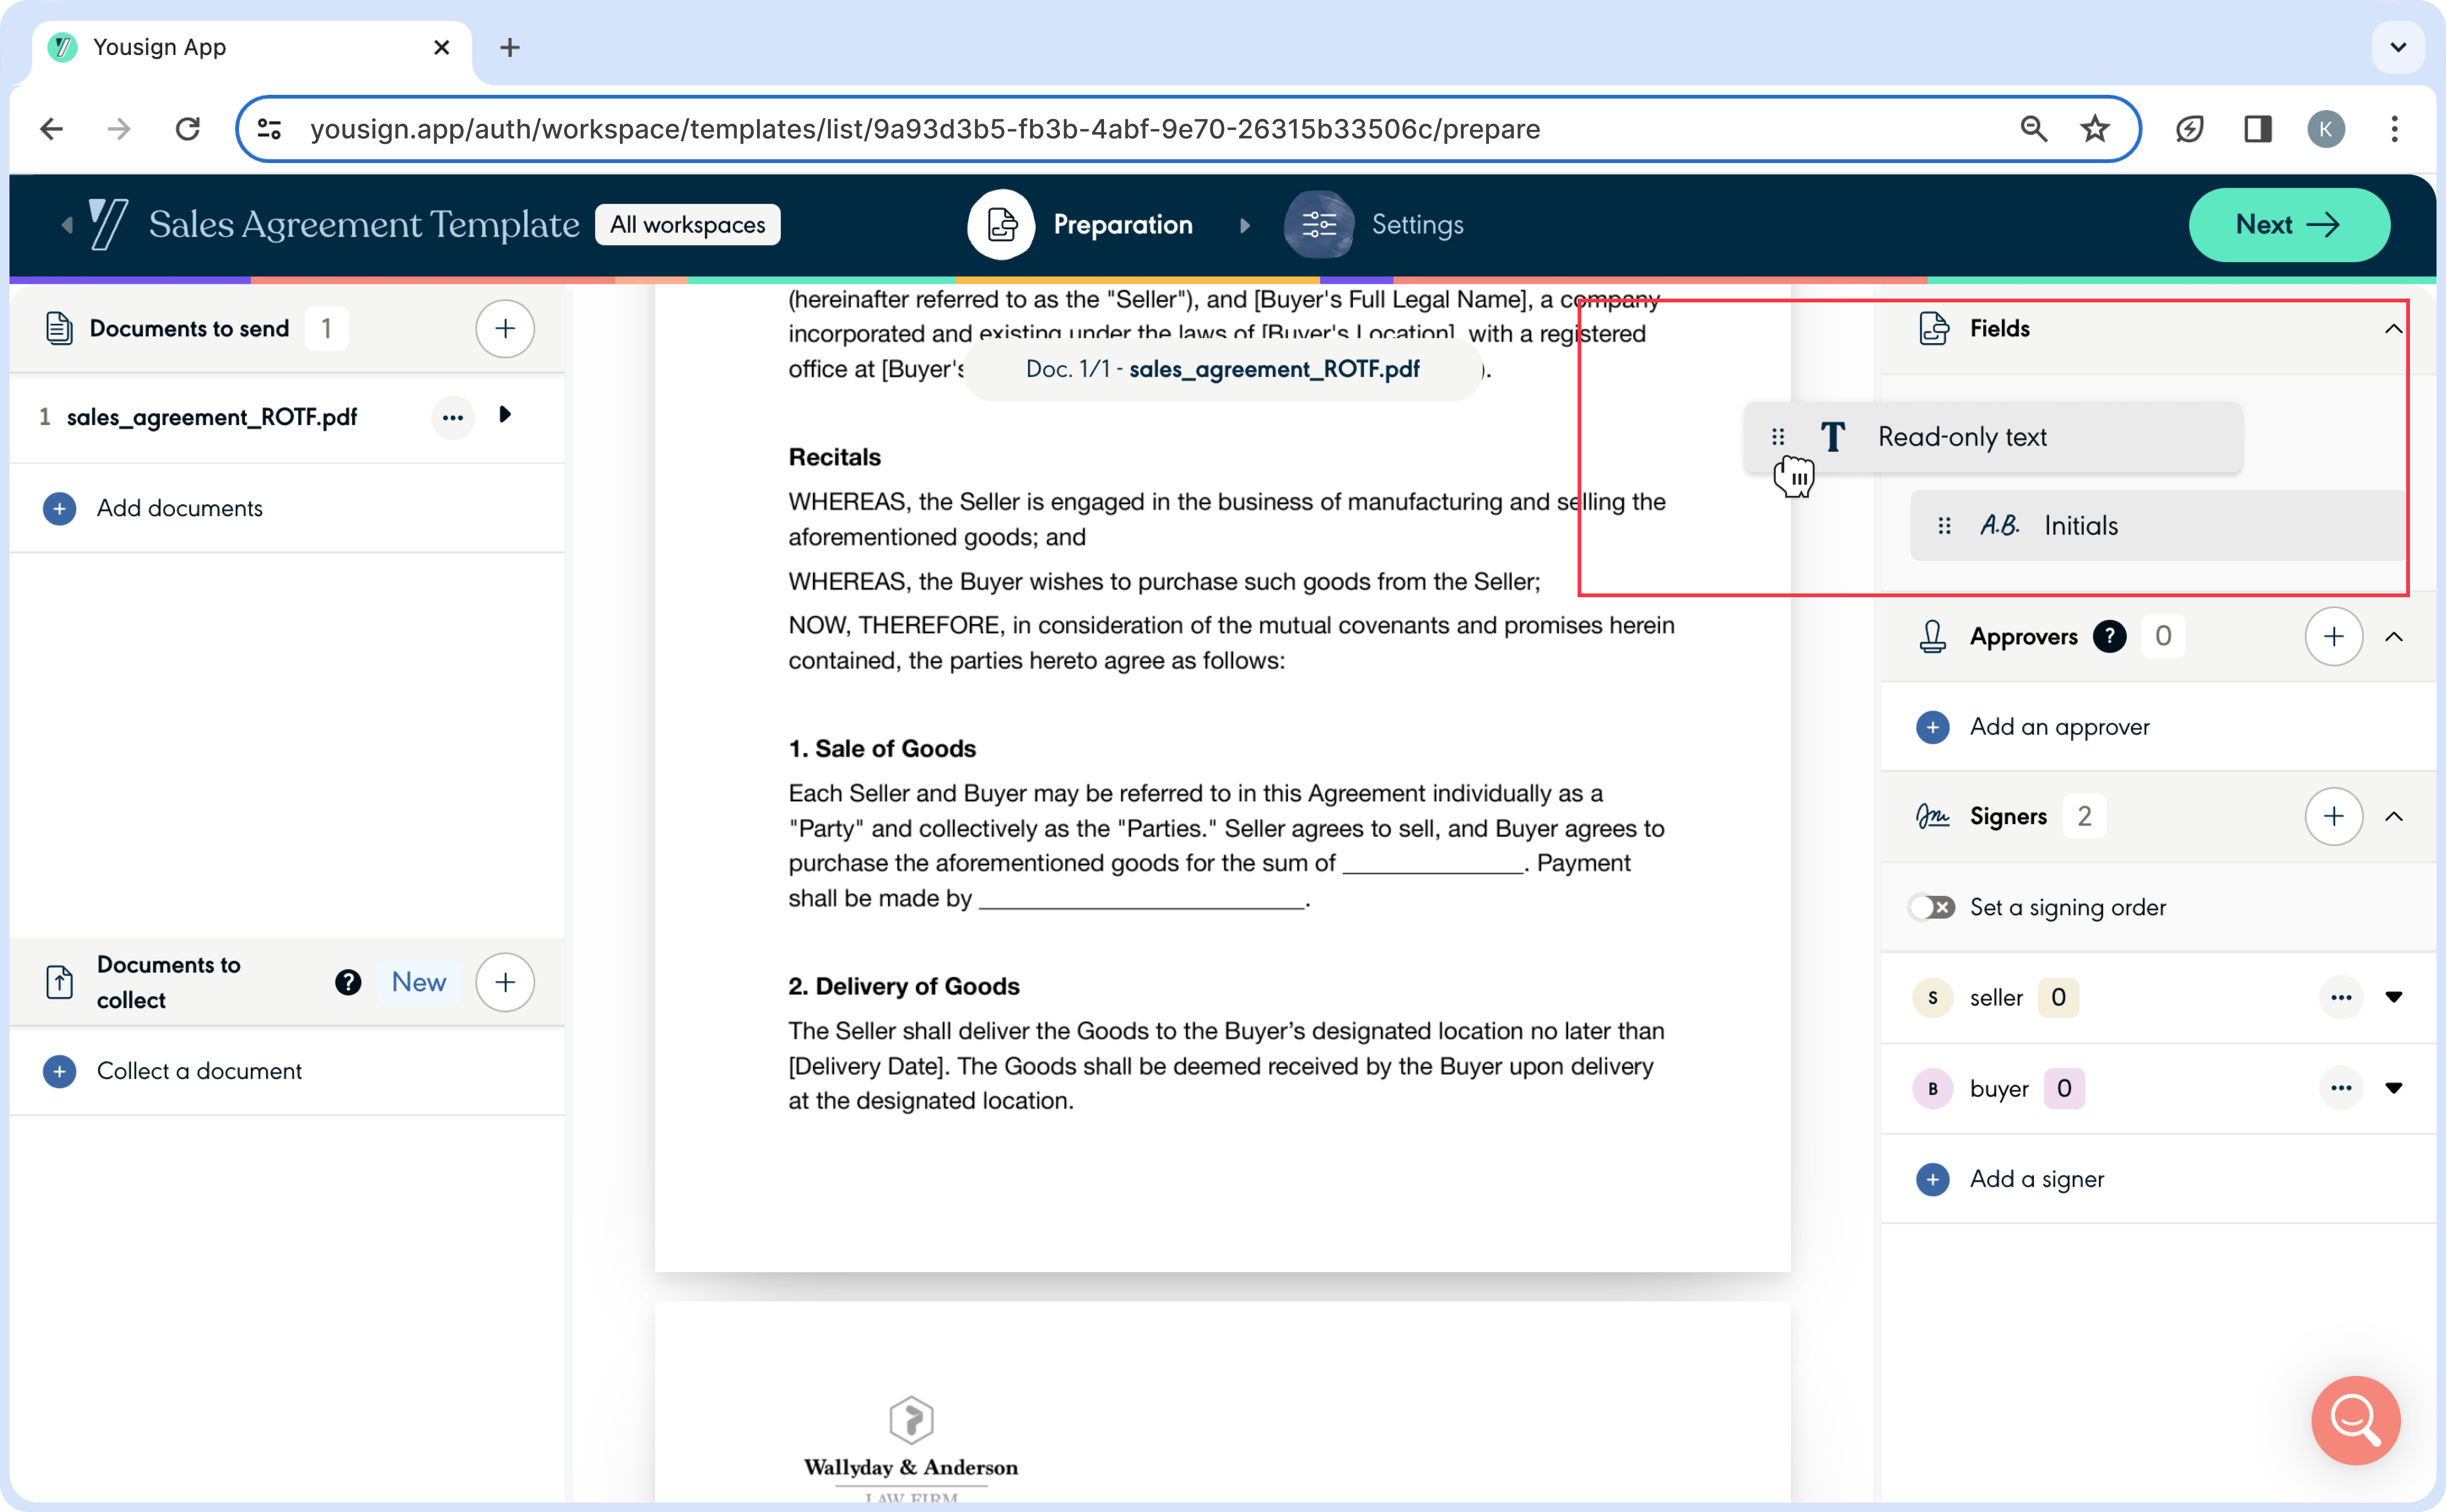
Read-Only Text Fields
Read-Only Text Fields allow you to add text on a document that won't be editable by any of the recipients. It's a way to quickly edit the document before sending it for signature.
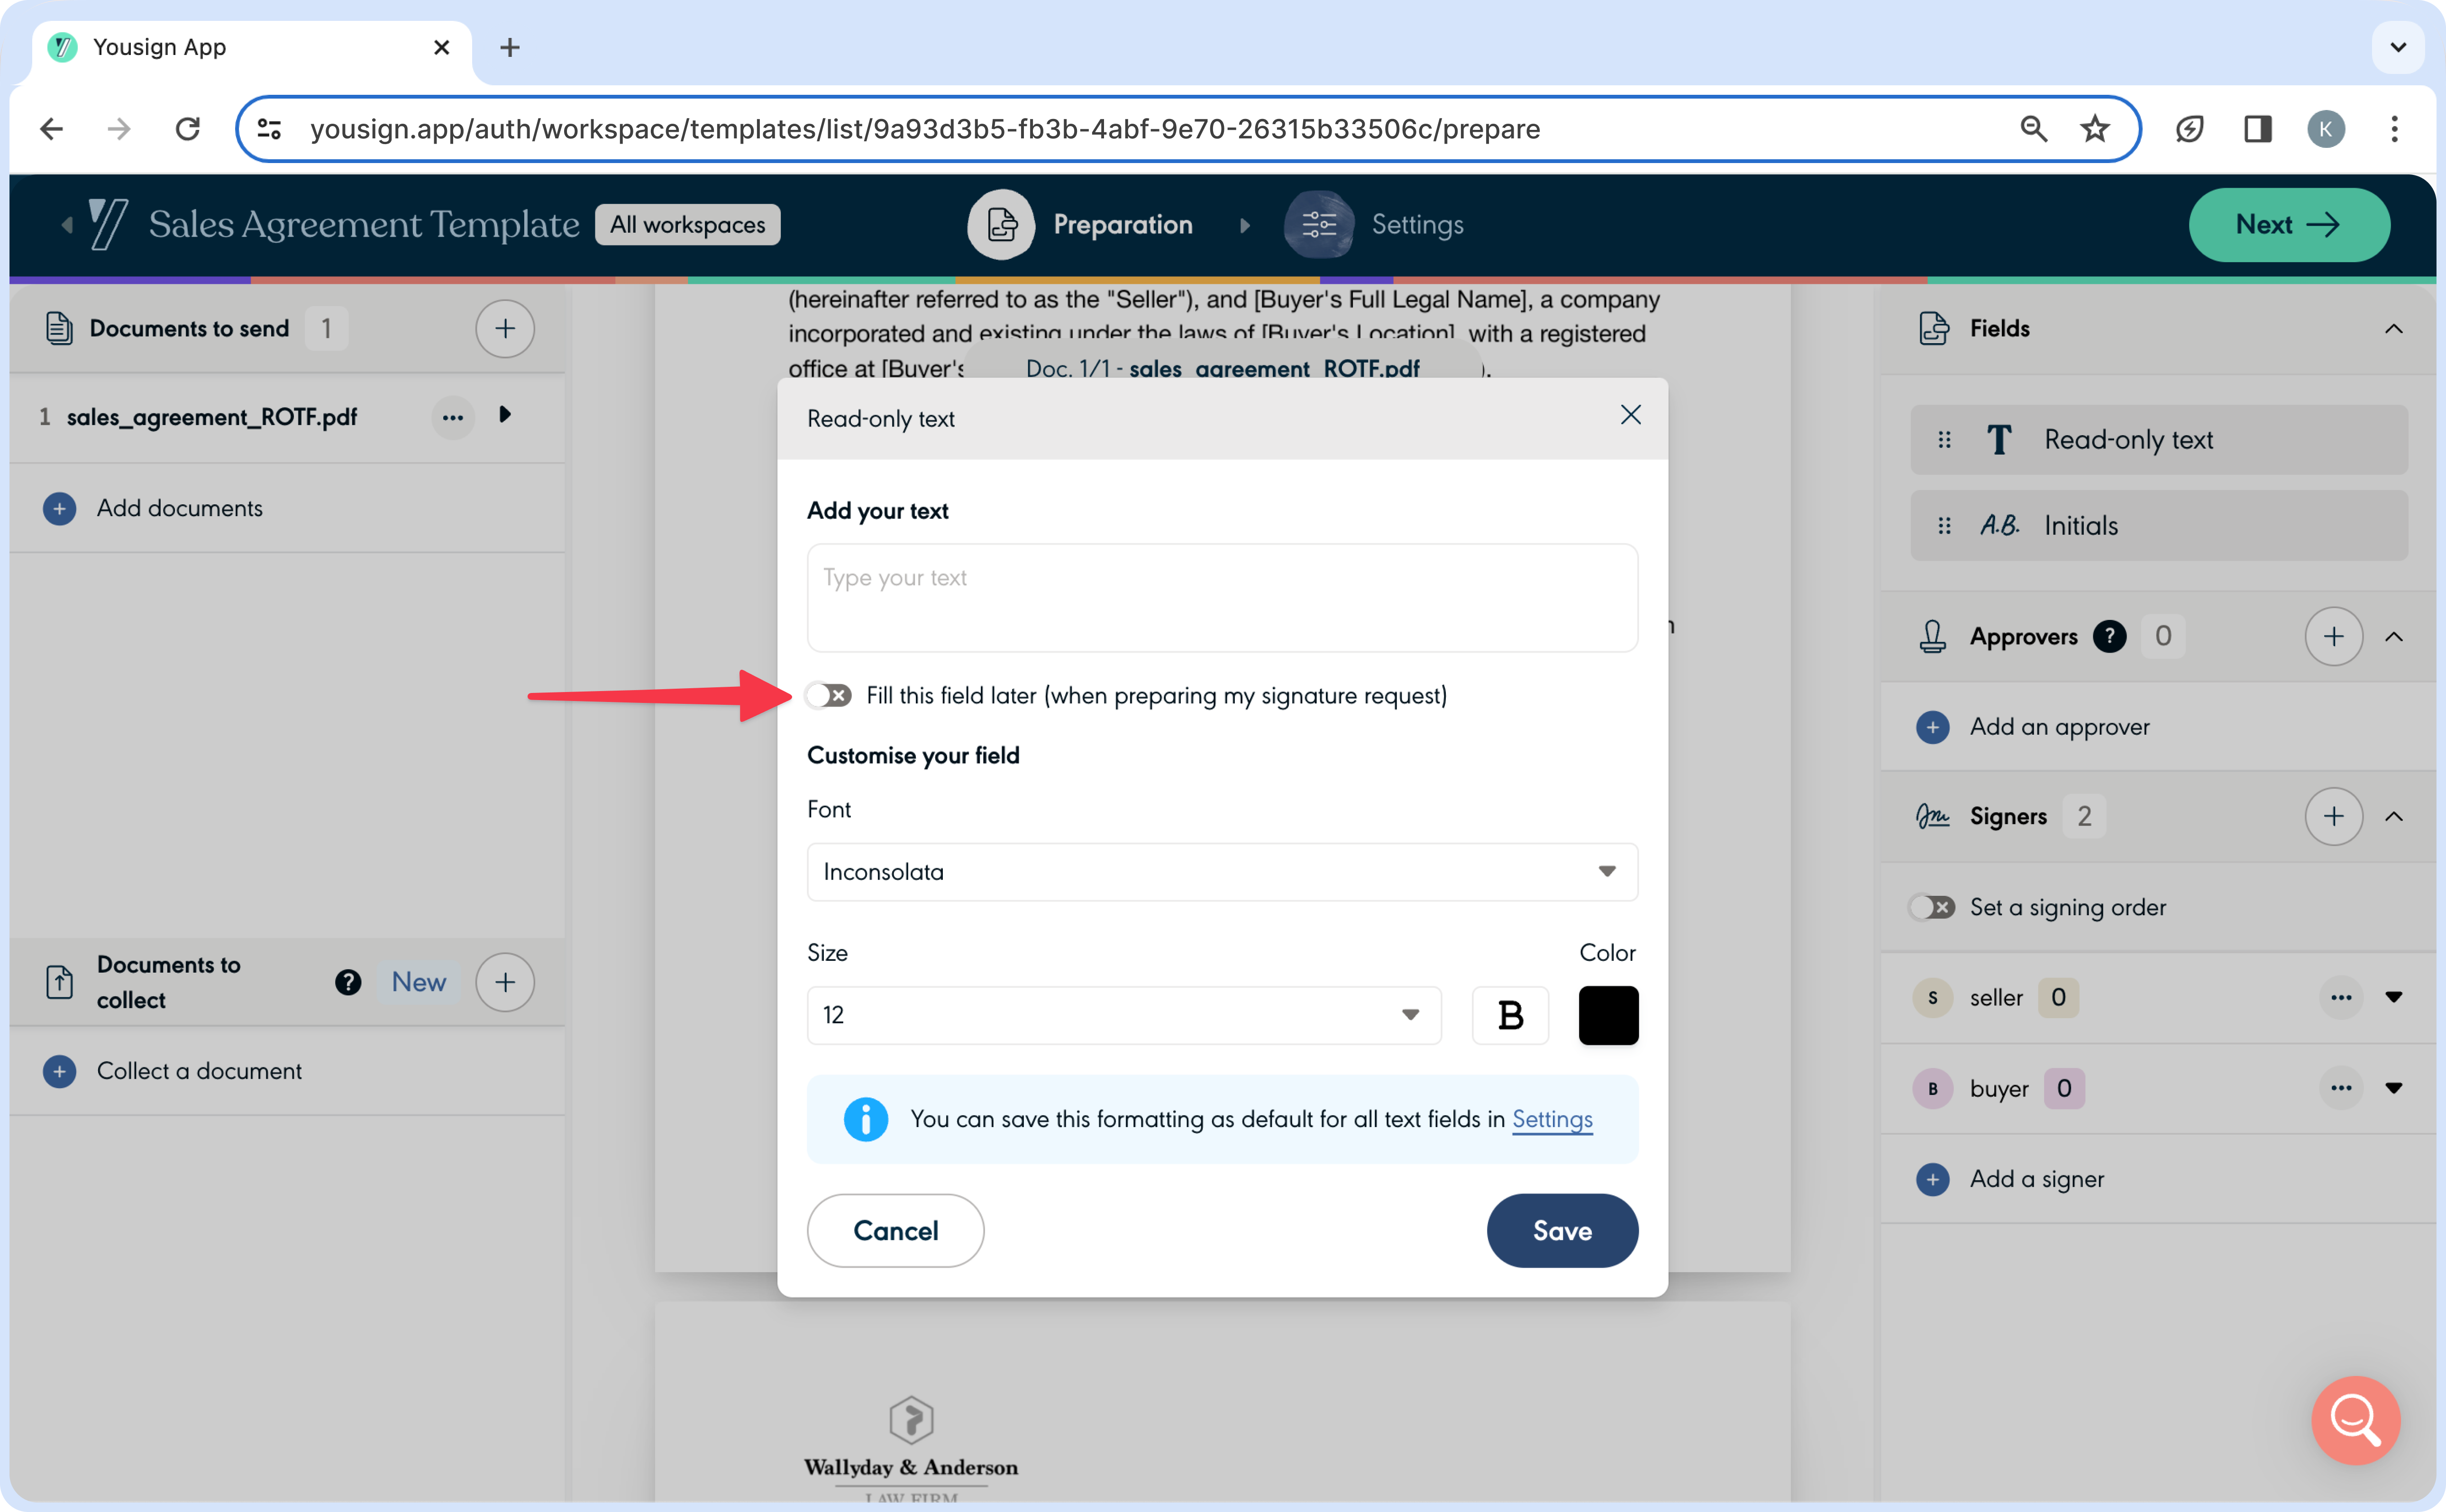
On a Template, you can choose to let such Field empty, and just assign it a label that helps identify the Field. Those Fields will have to be populated when a new Signature Request is created from the Template. This feature is particularly useful when certain document details, such as prices or terms, need to be customised for each request.
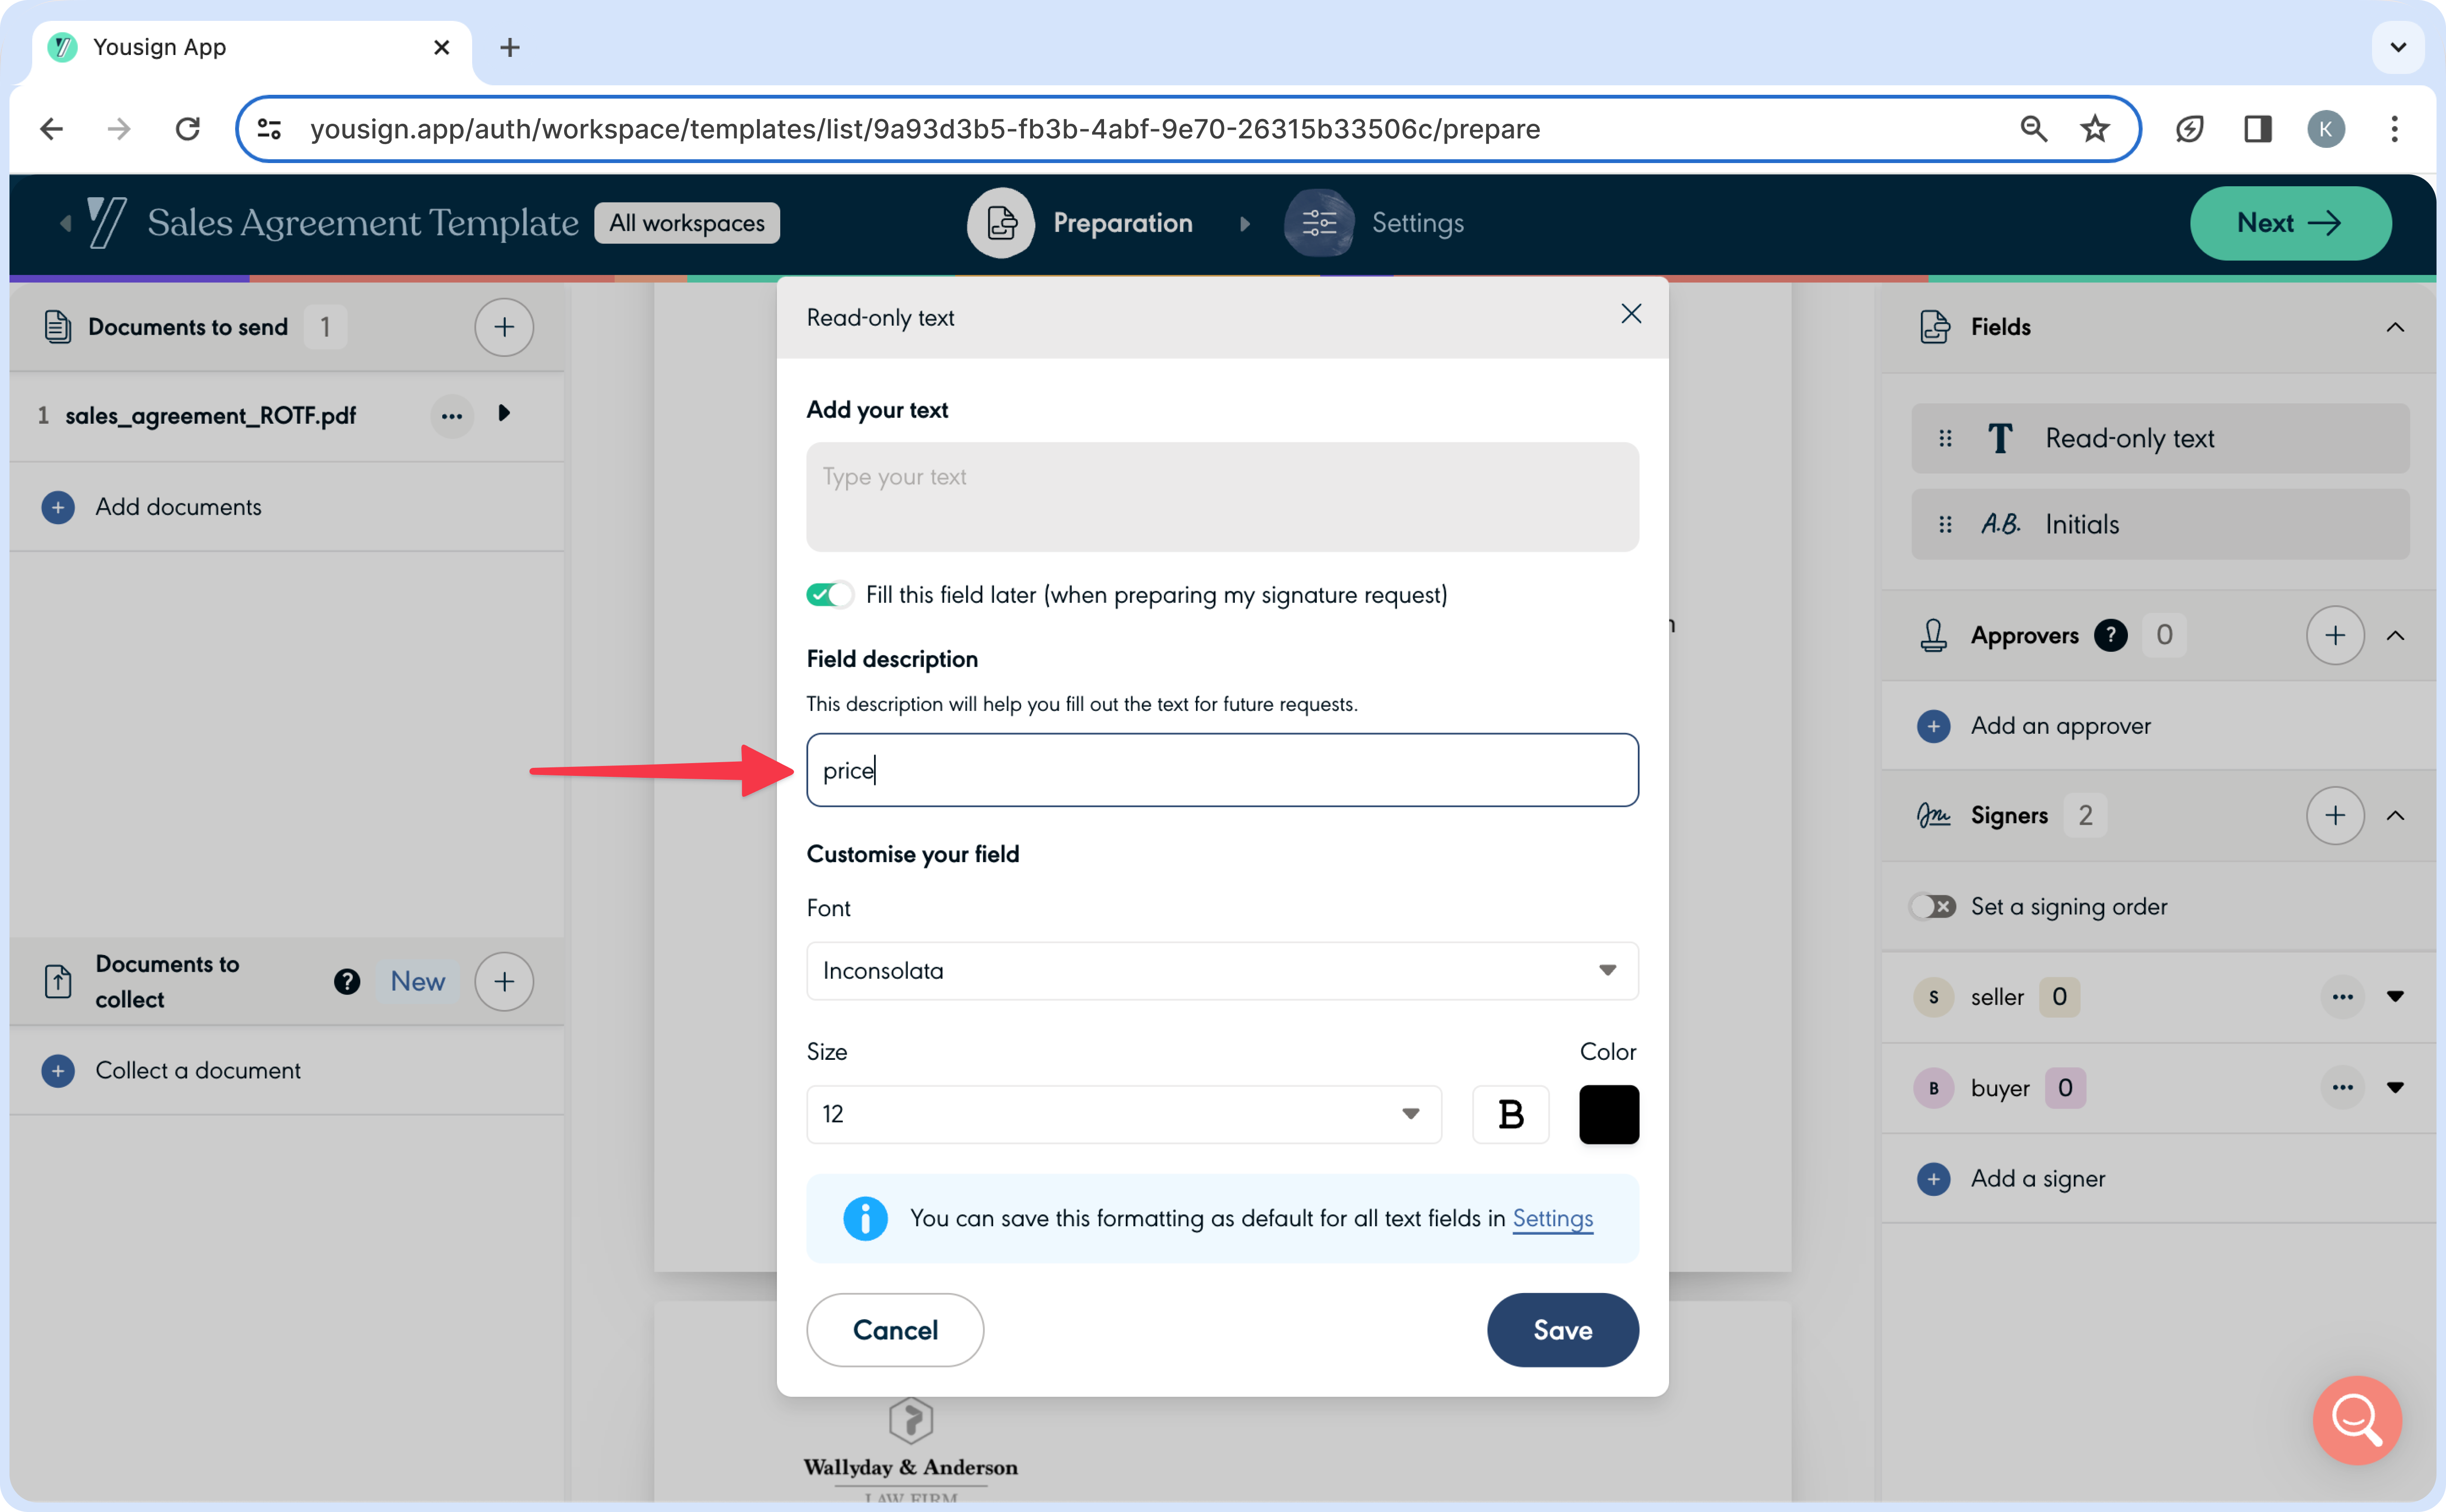
For example, on the Template of a sales contract, you can add an empty Read-Only Text Field, and give it a "price" label. Then each time a Signature Request will be created from that Template, you will be able to put a different price in that field (manually on the app or via API).
- Add a Read-Only Text Field
- Select “Fill this field later"
- Give a
labelto the Field
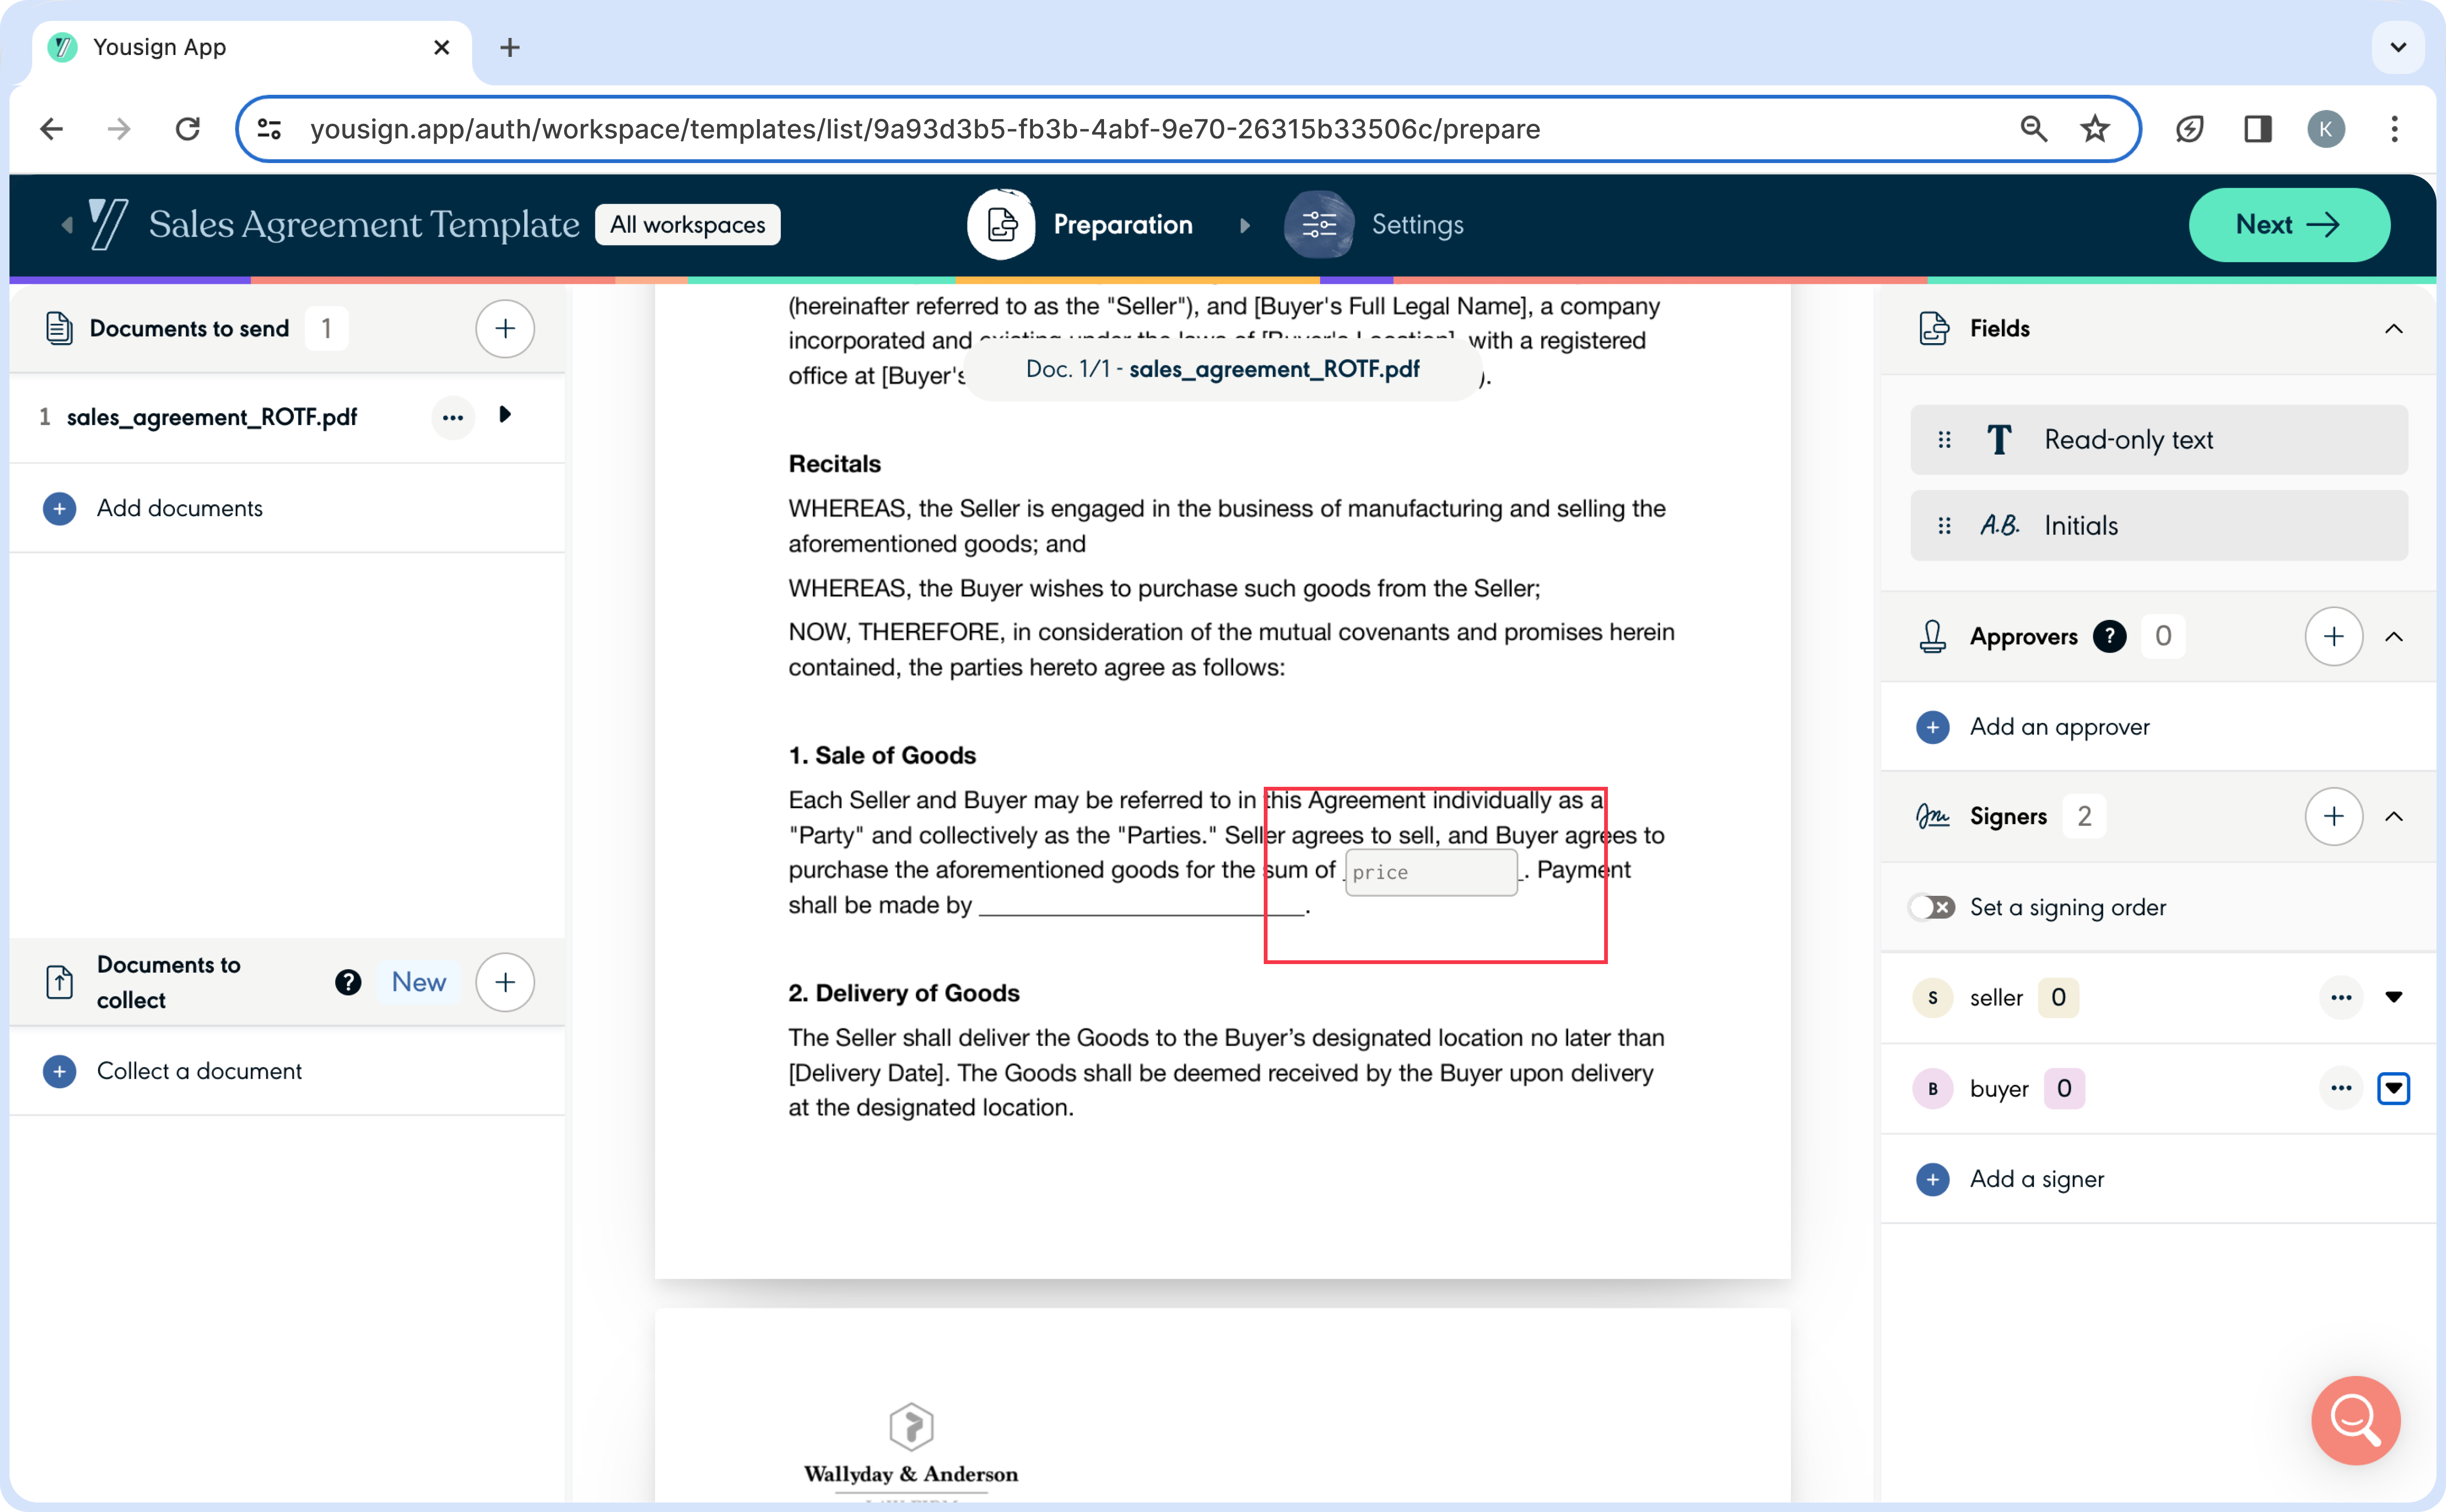
- Your empty Read-Only Text Field has been added to the Template
Create a Signature Request and populate the Template's empty Read-Only Text Fields
When you initiate a new Signature Request from the API, you must add a text value to each empty Read-Only Text Field contained in the Template.
Use the usual POST /signature_requests endpoint (see API Reference), and specify values for the template_placeholders object. Each empty Read-only Text Field is identified thanks to its label property.
Formatting rules
- The
labelis case sensitive, so make sure to use the exact copy (i.e. "price" is different from "Price").- The text length must not exceed 5000 characters
{
  "name": "A new SR from a Template",
  "delivery_mode": "email",
  "template_id": "9a93d3b5-fb3b-4abf-9e70-26315b33506c",
  "template_placeholders": {
    "read_only_text_fields": [
      {
        "label": "price",
        "text": "€5,000"
      },
      {
        "label": "paiement type",
        "text": "bank transfer"
      }
    ]
  }
}
Updated 2 days ago